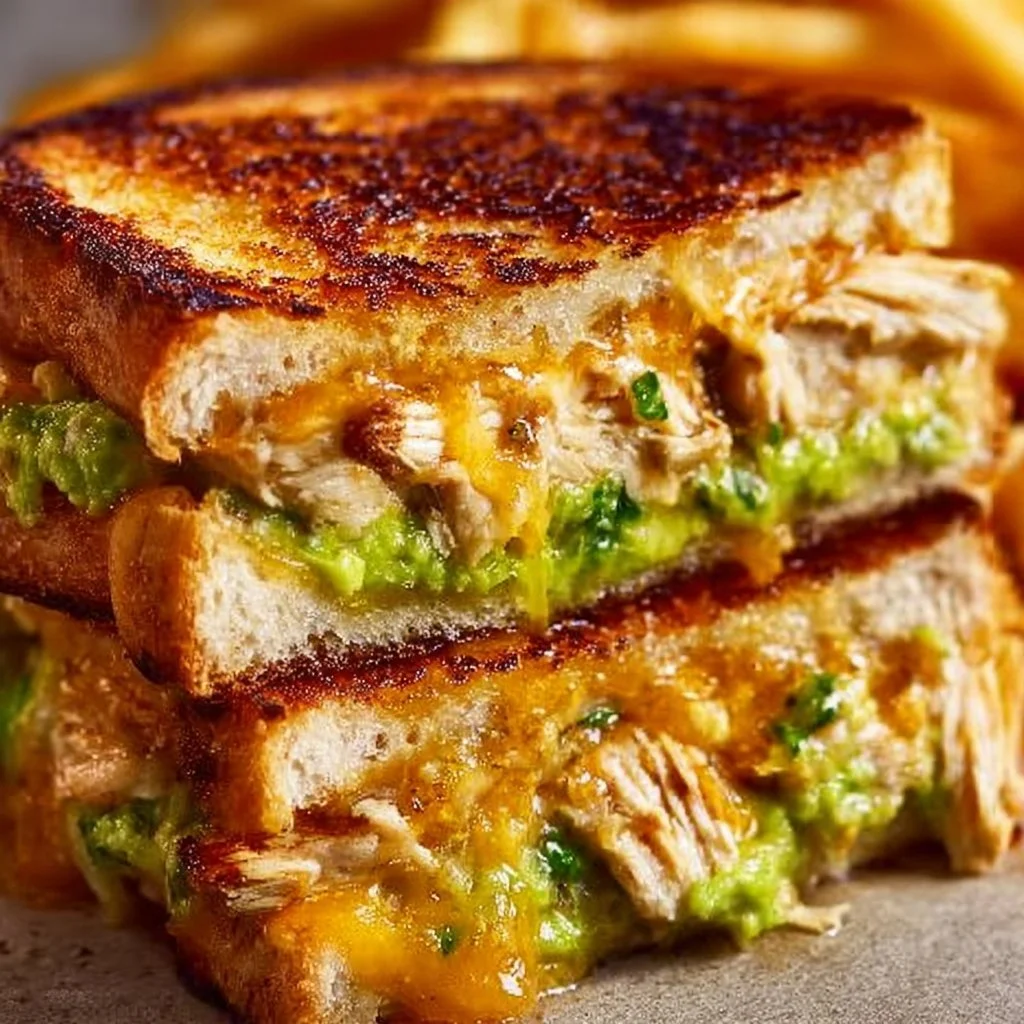
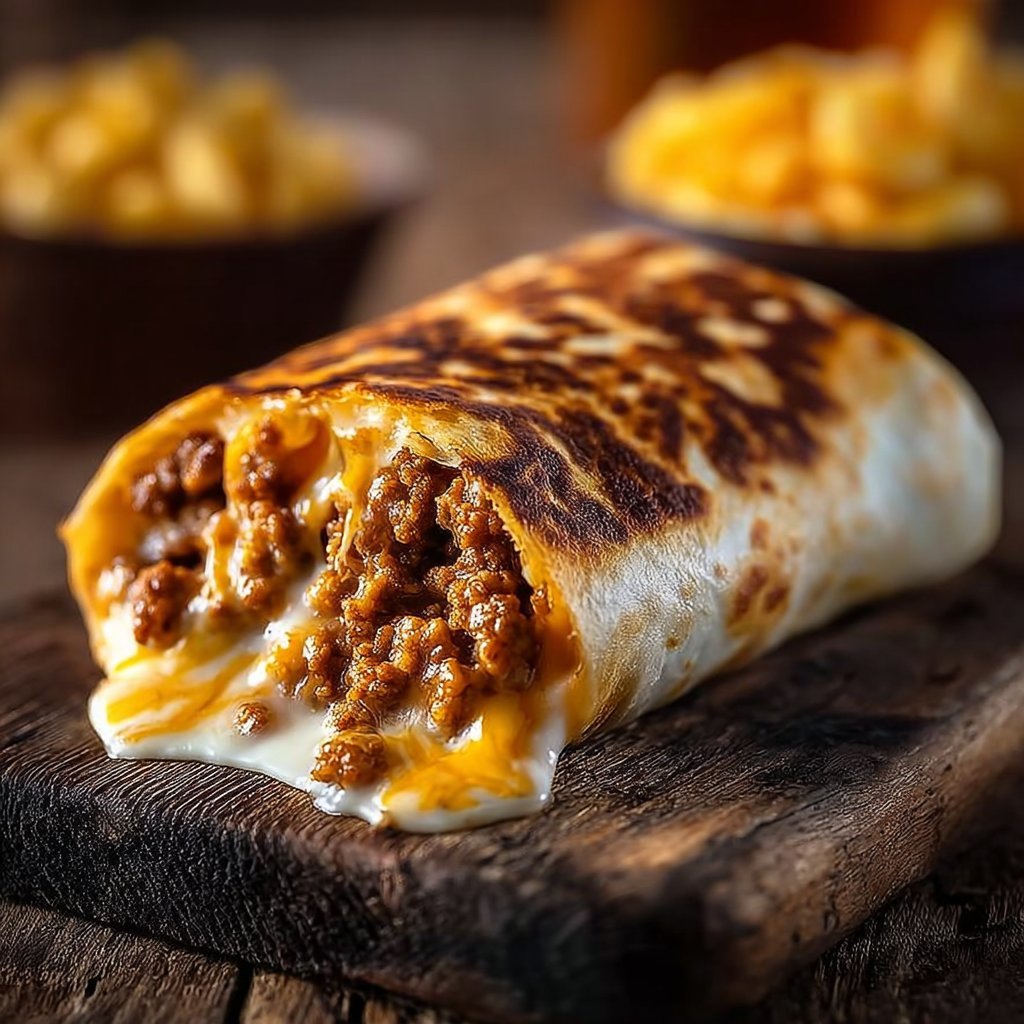
There’s something universally appealing about melted cheese, crispy bread, and delicious fillings all wrapped up in a neat little package. Welcome to the dazzling world of the Grilled Cheese Burrito! This dish marries the comforting familiarity of a classic grilled cheese sandwich with the fun and delightful essence of a burrito. Picture this: as you slice into the burrito, warm, gooey cheese oozes out, mingling with savory fillings that burst with flavor. It’s an explosion of textures and tastes—crispy on the outside, soft and cheesy on the inside—that will make your mouth water just thinking about it! Perfect for weeknight dinners or casual gatherings, this recipe is a hit with both kids and adults alike, making it a fantastic addition to your meal rotation.
Now, who wouldn’t love a dish that promises to deliver warmth and satisfaction in under 30 minutes? With its vibrant colors and inviting aroma wafting through your kitchen, the Grilled Cheese Burrito has become a family favorite. Whether you’re enjoying it solo or sharing with loved ones, each bite is a reminder of home cooking at its best. So, grab your spatula and let’s put this delightful creation on your dinner table tonight!
Understanding Grilled Cheese Burrito
The Grilled Cheese Burrito is a glorious fusion that combines the traditional elements of a cheese sandwich and the handheld convenience of a burrito. Originating from inventive food trucks to comfort food cafes across the United States, it showcases the charm of American culinary creativity. The dish typically features a flour tortilla filled with cheese, sautéed vegetables, and often protein options like grilled chicken or beans, all snuggled together before being toasted to perfection. This not only enhances the flavors but also creates a wonderfully melty, cheesy interior that contrasts beautifully with the crispy exterior of the wrap.
For added convenience and a depth of flavor, you can use techniques like slow cooking or even an air fryer to make your Grilled Cheese Burrito. These methods allow the ingredients to meld together harmoniously, resulting in a delightful bite every time. Often served against a backdrop of fresh salsa or creamy guacamole, it’s a dish that can elevate a casual night in or impress guests at a gathering. Fun fact: you can even customize the fillings based on what you have on hand, making this a versatile dish perfect for using leftovers!
Why You’ll Love This Grilled Cheese Burrito
This Grilled Cheese Burrito will not just satisfy your hunger but also tantalize your taste buds with its layers of flavor and texture.
- Ease of preparation: With just a handful of ingredients and simple steps, this recipe is accessible for cooks of any level. It’s a great way to involve kids in the kitchen, too!
- Flavor complexity: The combination of melted cheese with assorted fillings creates a delightful dance of tastes. You can customize your burrito with spices and toppings that match your family’s preference—think spicy jalapeños for a kick or fresh cilantro for a burst of freshness.
- Family-friendly: It’s hard to find someone who dislikes cheese, and wrapping all those flavors in a burrito just makes it fun to eat. Kids love to dig in, making mealtime a breeze.
- Budget-friendly: You can use whatever ingredients you have on hand. Flour tortillas, a selection of cheese, and some veggies can easily be transformed into a delicious meal without breaking the bank.
How to Make Grilled Cheese Burrito
Making a Grilled Cheese Burrito is a fun journey that anyone can embark on, even if you’re new to cooking! You will be preparing melted cheese, warm tortillas, and a few choice fillings, combining them all before giving them a quick toast.
Main tools you’ll need:
- A non-stick skillet or frying pan
- A spatula
- A cutting board and knife
Prep time: Approximately 10 minutes
Cooking time: About 10-15 minutes
Ingredients
- Flour tortillas (large): These provide the base and hold everything together; you can also use whole wheat tortillas for added nutrition.
- Shredded cheese (mozzarella, cheddar, or jack): The more, the merrier! Cheese creates that gooey inside that everyone loves.
- Fillings (cooked chicken, beans, sautéed onions, and peppers): Customize based on preference or leftovers, adding depth to every bite.
- Olive oil or butter: For grilling, giving the burrito that desirable crunchiness.
- Spices (cumin, chili powder, garlic powder): These enhance the flavor, providing warmth and richness.
Directions
- Gather all your ingredients: Arrange your tortillas, cheese, and desired fillings on your workspace. This will streamline your process and keep things organized.
- Heat the skillet: Place your skillet on medium heat, adding a drizzle of olive oil or a pat of butter. Let it simmer until the oil shimmers or the butter melts, creating a beautiful aroma.
- Assemble the burrito: Lay a tortilla flat in the pan. Sprinkle a generous amount of shredded cheese (don’t be shy!) on one half of the tortilla, then layer your choice of fillings on top of the cheese.
- Fold and grill: Fold the tortilla in half over the fillings. Press down slightly with a spatula to ensure contact with the heat. Allow it to grill for 2-3 minutes or until the bottom becomes golden brown.
- Flip and finish: Carefully flip the burrito and let it cook another 2-3 minutes until it’s golden and the cheese melts. If needed, you can reduce the heat to prevent burning while allowing time for the insides to melt.
- Slice and serve: Remove the burrito from the skillet and let it rest for a minute. Slice it in half to reveal the delightful stretchy cheese and flavorful filling inside, then serve immediately!
- Troubleshooting: If the cheese is not melting, ensure you are using enough heat or let it continue cooking for a longer period with a lid on the skillet to trap heat.
Delicious Pairings for Grilled Cheese Burrito
The Grilled Cheese Burrito can stand proudly on its own, but pairing it with complementary sides can enhance the meal further. Consider serving it with a light, fresh salad for a crunchy contrast. A zesty coleslaw brings an extra layer of texture, while guacamole delivers a creamy richness that melds beautifully with the chewy burrito. Don’t forget a side of homemade salsa or pico de gallo—its freshness can cut through the richness of the cheese and give your taste buds a lively boost. For a soul-warming touch, a bowl of tomato soup is a classic pairing, perfect for dunking your cheesy creation!
Top Tips for Perfecting Grilled Cheese Burrito
Focus on technique to ensure your Grilled Cheese Burrito turns out flawlessly every time. Knowing how to adjust your cooking process can elevate this meal from good to exceptional.
- Ingredient swaps: Try different cheeses like Pepper Jack for some heat or Swiss for a nutty flavor alternative.
- Spice adjustments: Feel free to experiment with spices like smoked paprika or oregano to enhance the flavor profile.
- Equipment advice: A non-stick skillet is recommended to prevent sticking, but if you’re looking for an even crunchier exterior, using a panini press could work wonders.
- Storage tips: Allow any leftovers to cool before storing in an airtight container in the refrigerator. They’ll keep well for a couple of days.
- Mistakes to avoid: Be careful not to overcrowd the burrito; too many fillings might prevent it from sealing well, leading to unwanted spills during cooking.
Variations & Add-Ins
How about shaking things up a bit? For a hearty breakfast twist, consider adding scrambled eggs and breakfast sausage into your burrito, creating a delightful morning treat. If you’re feeling adventurous, try incorporating sweet potato for a satisfying sweetness that contrasts beautifully with the gooey cheese. Veggie lovers can load theirs with sautéed mushrooms, spinach, and zucchini for a fulfilling meal rich in nutrients!
Kid-Friendly Version
Making a kid-friendly version of the Grilled Cheese Burrito is simple! Opt for mild cheese to prevent overwhelming flavors; consider swapping traditional fillings for chicken nuggets or friendly veggies like diced bell peppers for added crunch and color. You can even let your kids help assemble their own burritos; letting them choose toppings fosters a fun and engaging experience at mealtime.
Storing and Reheating Tips
To store your Grilled Cheese Burrito, allow it to cool completely to prevent moisture buildup. Wrap the burrito tightly in aluminum foil or parchment paper before placing it in an airtight container. Properly stored, it can last in the refrigerator for up to three days. The key is to ensure it’s completely cool first—this helps avoid sogginess when stored.
When it comes time to reheat your leftovers, try using an air fryer or oven for the best texture. Simply place the burrito in the air fryer basket at 350°F for about 5-7 minutes, or until heated through, reminding you of its fresh, crispy, cheesy goodness. If using the microwave, remember that the burrito may become slightly chewy, so consider wrapping it in a damp paper towel to retain moisture while heating!
FAQs
Q: Can I prep the fillings ahead of time?
A: Absolutely! Preparing your fillings in advance can save time on weeknights. Cook proteins, and chop vegetables, then store them in airtight containers in the fridge. They’ll be ready to toss in the tortilla when you’re ready to cook.
Q: Can I use gluten-free tortillas?
A: Yes! Gluten-free tortillas are a fantastic substitute, allowing those with dietary restrictions to enjoy this dish without compromise.
Q: What can I do with any leftover burritos?
A: Leftover burritos can be stored in the same way as above, and they’re also delicious when sliced and used in salads or served with a side of soup.
Q: How can I make this recipe vegetarian?
A: For a fulfilling vegetarian option, consider adding beans, and roasted vegetables, or using only cheese with avocado for a creamy touch.
Q: How long does it take to prepare the Grilled Cheese Burrito?
A: Cooking the burrito takes around 10-15 minutes after preparation, making it a quick option for any meal.
Conclusion
The Grilled Cheese Burrito is not just another meal; it’s a delightful fusion that’s sure to please everyone at your table. With its gooey cheese, customizable fillings, and delightful crunch, it embodies the warmth and comfort of home cooking. Give it a try tonight, and I promise it will quickly become a cherished addition to your family’s recipe collection. Don’t forget to let me know how it turned out—happy cooking!
Grilled Cheese Burrito

A delightful twist on the classic comfort dish, this Grilled Cheese Burrito combines gooey melted cheese with savory fillings, all wrapped in a crispy tortilla.
- Prep Time: 10 minutes
- Cook Time: 15 minutes
- Total Time: 25 minutes
- Yield: 4 servings
- Category: Main Course
- Method: Grilling
- Cuisine: American
- Diet: Vegetarian
Ingredients
- Flour tortillas (large)
- Shredded cheese (mozzarella, cheddar, or jack)
- Fillings (cooked chicken, beans, sautéed onions, and peppers)
- Olive oil or butter
- Spices (cumin, chili powder, garlic powder)
Instructions
- Gather all your ingredients and arrange them on your workspace.
- Heat a skillet over medium heat, adding olive oil or butter.
- Assemble the burrito by laying a tortilla flat, adding cheese, and desired fillings.
- Fold the tortilla in half and press down with a spatula, grilling for 2-3 minutes until golden brown.
- Flip the burrito and cook for another 2-3 minutes until golden and the cheese is melted.
- Slice and serve immediately to enjoy the stretchy cheese and flavorful filling.
Notes
Customize the fillings based on preference or leftovers. Serve with salsa or guacamole if desired.
Nutrition
- Serving Size: 1 burrito
- Calories: 350
- Sugar: 2g
- Sodium: 700mg
- Fat: 20g
- Saturated Fat: 10g
- Unsaturated Fat: 8g
- Trans Fat: 0g
- Carbohydrates: 35g
- Fiber: 3g
- Protein: 15g
- Cholesterol: 30mg
Keywords: Grilled Cheese, Burrito, Comfort Food, Easy Recipe, Kids Friendly, Vegetarian